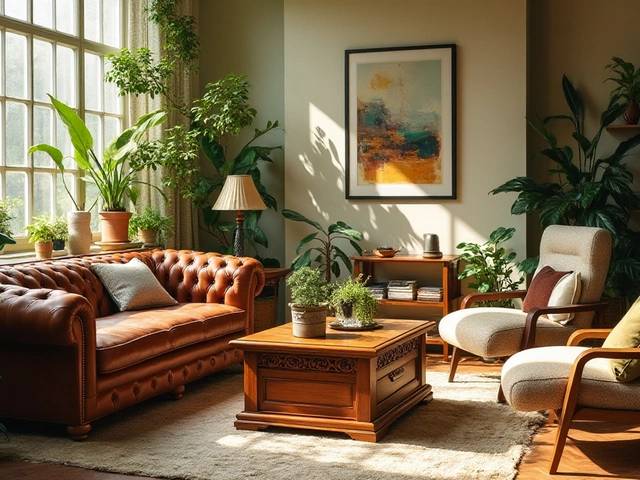
Building your own wardrobe might seem like a grand adventure to some, while others might see it as a daunting task. The question of whether it’s cheaper to build one yourself than to buy it off the shelf is a common consideration for many looking to revamp their storage solutions.
If you’ve ever wandered the aisles of a furniture store only to find that nothing quite fits your vision or budget, constructing a wardrobe might offer some satisfaction and savings. However, before you dive headfirst into a project, understanding what it entails financially and practically is crucial.
This article will explore the costs associated with a DIY wardrobe project, weigh them against the expense of purchasing a ready-made one, and provide tips for those brave enough to take on the challenge.
- Understanding Costs of DIY Wardrobes
- Materials and Tools Needed
- Time and Effort Involved
- Comparing DIY and Store-Bought Wardrobes
- Tips for Building Your Wardrobe
- When to Consider Professional Help
Understanding Costs of DIY Wardrobes
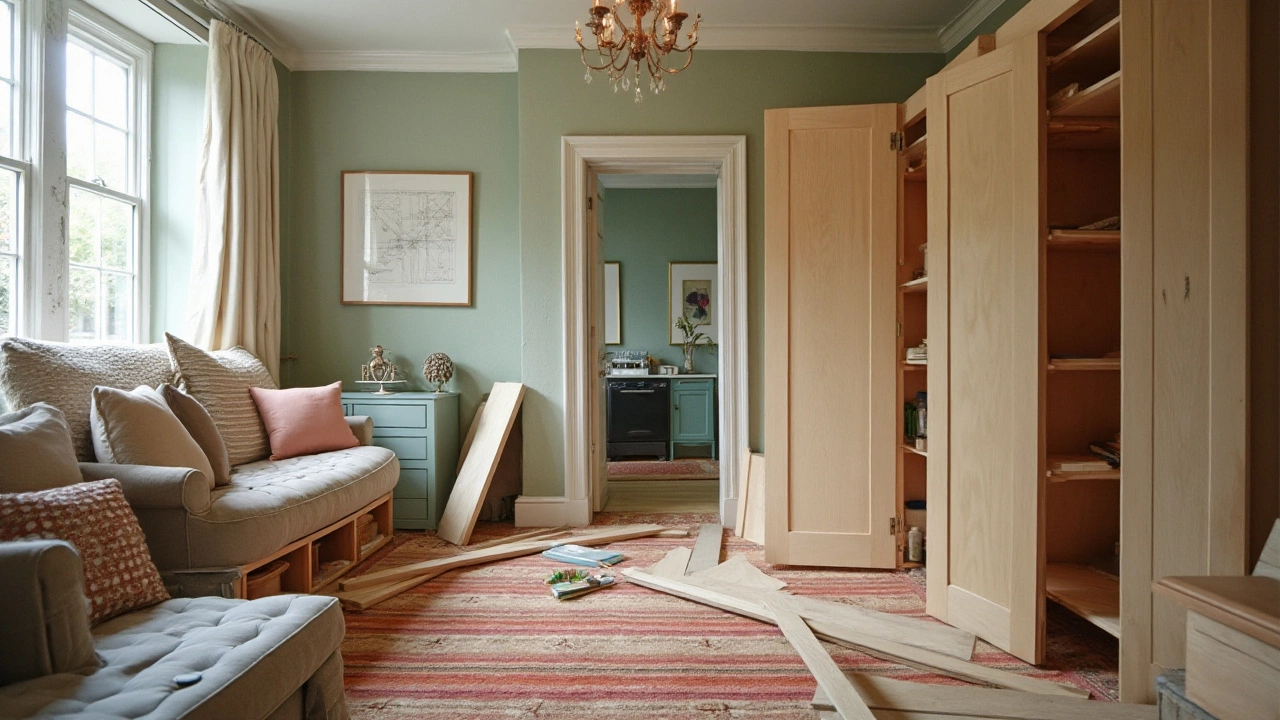
Creating your own wardrobe from scratch can be a rewarding experience, but it's important to explore all the potential costs involved before embarking on this ambitious project. The financial implications of building a DIY wardrobe can vary significantly, as factors such as material quality, size, and complexity can dramatically affect the overall price. A project can range from a simple organizational unit that fits snugly in a small space, costing you mere hundreds, to a grand, custom-made statement piece that might stretch into thousands.
Let's delve into materials first. Wood is a popular choice for wardrobes, with options like pine, oak, and plywood catering to different budgets and aesthetics. For instance, plywood can offer a cost-effective route for those on a tight budget, typically priced at around £15-£30 per sheet. On the other hand, high-end oak could set you back more than £50 per board, not to mention the added expenses for finishes and stains. Specialist tools, such as saws and drills, may require investment if not already owned, with basic sets starting from £50. Don’t forget the hardware, including hinges, handles, which can both be surprisingly pricey.
Additionally, consider the time and labor costs, both of which carry their own currency. The bigger the project, the more you should expect to spend on labor, even if it’s just your own. For many DIY enthusiasts, the time invested in learning new skills, like joinery or complex design cuts, can itself represent a heavy investment. A comprehensive list of what you might need could be endless, but here are a few key inclusions: screws and nails, of course, but maybe some drawer slides if you’ve ventured into compartmentalization, and let’s not forget the adhesives essential for securing everything seamlessly.
"A budget needs to be the first step," advises seasoned DIY blogger Tom Chambers in his piece on home projects. "Without a proper estimate of your resources, a DIY can quickly spiral out of cost-efficiency into a strained endeavor."
To understand these potential plethoric costs, consider devising a meticulously detailed budget plan. This should encompass an estimate of what each necessary item might bring to your financial table. Perhaps more importantly, it should also include a clear-cut memory or visualization of your end-goal, to ensure that every expense truly adds up toward a cohesive, desirable finish. After all, sometimes the cost not only involves the actual monetary expense but also intangibles like time, passion, and dedication—elements that, for many, are invaluable.
Materials and Tools Needed
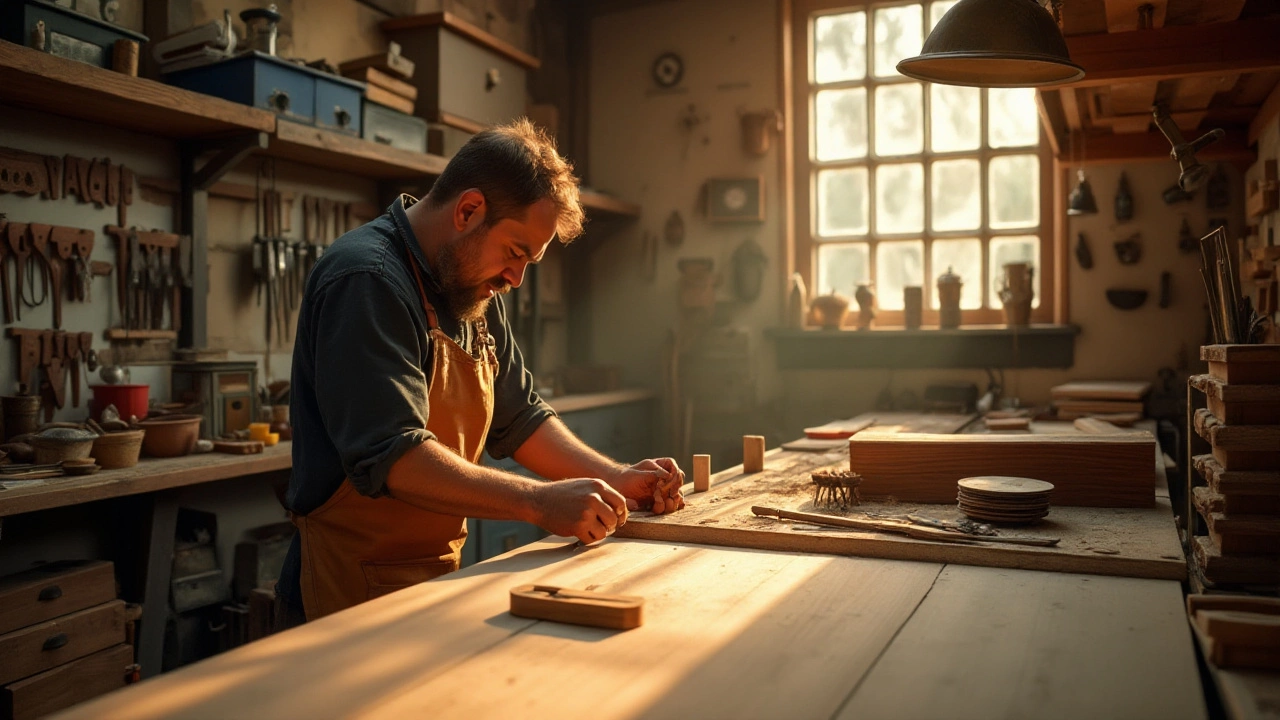
Diving into a DIY wardrobe project requires a thoughtful selection of materials and tools. The essence of crafting a wardrobe begins with choosing between various materials like solid wood, plywood, MDF, or industrial-style metals. Each has its merits in durability, aesthetic appeal, and cost, so understanding their differences is crucial. Solid wood such as oak or pine is famed for longevity and beauty, whereas plywood and MDF provide a more budget-friendly option. These engineered woods are usually lighter and easier to handle, making them popular choices for first-time builders. If a modern, industrial look piques your interest, you might consider metal frames. They offer a robust and sturdy structure, often giving your wardrobe a sleek finish. The key is to align these materials with your overall design and space requirements to achieve a harmonious look.
Once you have settled on the materials, assembling the right tools is your next task. Essential tools include a saw (circular or jigsaw), hammer, drill, measuring tape, and a level. These tools form the backbone of your toolkit and ensure precise construction. A circular saw, for example, allows for cleaner cuts and can handle the thickness of solid wood more effectively than a handsaw. Accurately measuring your cuts is paramount to a smooth assembly process, so don't underestimate the power of a reliable measuring tape and level. You might even consider investing in a power drill for making holes and quickly screwing in hardware like hinges and handles. An experienced woodworker once said, "The excellence of a crafted piece starts and ends with the diligence in measurements.” Adding a sanding block will help smooth rough edges, ensuring everything fits nicely, both in construction and in your home.
To enhance your project quality, you might include additional items like wood glue, various screws, brackets, and finishing materials like paint or stain. Wood glue is vital for strong joints, offering reinforcement where nails might not suffice on their own. Screws and brackets will secure your wardrobe frame, providing stability and durability to withstand daily use. Selecting the right finish depends on your personal aesthetic—paint can offer a burst of color and character, whereas a wood stain can highlight the natural grain, lending warmth and elegance to the piece. Hardware such as door handles or drawer pulls should not be overlooked, as they add functional flair to your wardrobe. Used wisely, these can become statements in themselves.
"Investing time and effort in selecting quality materials and tools will pay dividends in both project satisfaction and the everyday use of your DIY creation." — Elizabeth H., Master Carpenter
With the right selection of materials, tools, and accessories, your journey into building a DIY wardrobe becomes not only realistic but rewarding. It's a blend of thoughtful preparation, creative vision, and hands-on craftsmanship that brings a unique touch to your home. These elements together shape an experience that’s profoundly satisfying, providing both tangible results and personal growth for anyone embarking on this journey.
Time and Effort Involved
Building a wardrobe from scratch is not just an investment in materials; it requires a substantial amount of time and effort. Many DIY enthusiasts take on projects with optimism, but it’s crucial to set realistic expectations. From planning your wardrobe design to the final touches, each step demands time and patience. First, let us talk about planning. You need to spend several hours, if not days, conceptualizing your wardrobe's design, getting the measurements just right, and ensuring it will fit in your designated space.
Once the planning phase is done, you embark on sourcing the materials. This might mean multiple trips to hardware stores, especially if you are looking for high-quality materials at the best price. It takes time to handpick wood, paints, or adhesives that will work seamlessly together. A crucial point to note is the skill level required. While many online tutorials make it look simple, the reality is that woodworking skills, though learnable, take practice to perfect. Efforts increase with the complexity of the design and intricacies like carving or molding details.
"Every project is unique, and the time it takes can vary widely—between an evening to several weeks—depending on your design's complexity," says renowned DIY expert Bob Vila.For those juggling this project with a full-time job or family commitments, you may find your evenings and weekends quickly filled with sawing, drilling, and assembling. Bear in mind the finishing touches often take longer than anticipated. Sanding, painting or staining, and letting layers dry require patience and more than a good dose of perseverance. You'll also need to factor in any inevitable mistakes or delays. Perhaps a particular piece doesn’t fit quite right, or something was overlooked.
Rewards for your dedication are tangible—not only do you save on labor costs, but there's genuine satisfaction in creating something with your own hands. However, it’s worth weighing the opportunity cost of your time against a purchase. Many discover that their eagerness may overshadow the actual investment needed. If you enjoy the process and learning curves, this can offset potential burnout. However, it's worth noting that friends or family may not appreciate a living space taken over by a half-finished project.
Comparing DIY and Store-Bought Wardrobes
When considering whether to embark on a DIY wardrobe project or to purchase a ready-made solution, there’s quite a bit to weigh. First and foremost is the matter of cost. In many instances, people assume that building a wardrobe from scratch will be more economical. After all, there is a pervasive belief that avoiding retail markups on labor and shipping can save a tidy sum. But it's not always so simple. The cost of materials such as high-quality wood, paint, varnish, fixtures, and tools can quickly add up. And let's not forget the value of time. What may seem affordable on paper could end up being a dear investment of your weekends and evenings over weeks or even months.
On the flip side, store-bought wardrobes offer the advantage of convenience and immediate gratification. Walking into a store or browsing online and finding that perfect fit within budget can be a timely delight. Retail options often come with the benefit of a warranty or guarantee, giving peace of mind should any defects arise. Popular European flat-pack furniture brands have made wardrobes even more accessible, fitting tightly into the nooks of modern living spaces. According to a survey by Home Furnishings Association, 65% of UK households reported having at least one piece of self-assembled furniture, driving this DIY-inspired shopping trend.
Yet, there’s more than just the initial purchase price to think about. The construction and customization opportunities a self-built wardrobe offers cannot be matched by mass-produced items. You have complete control over the dimensions, materials, and aesthetics, ensuring a piece that exactly suits your needs and space. However, for those less inclined toward carpentry, assembling a store-bought wardrobe can be an easier, more relaxing task. As the renowned maker extraordinaire, Paul Sellers, once said,
"Crafting with one's own hands lends a satisfaction unknown to most who navigate life in the ready-made lane."
Aside from cost and effort, there's the aspect of unique expression. A homemade wardrobe can become a canvas for personal expression, reflecting one's personality and style. On the contrary, a store-bought wardrobe is more about fitting into an existing aesthetic or theme in your home. While you may find delight in showcasing your handiwork, ready-made wardrobes offer a cohesive design language that can integrate seamlessly with other pieces from the same collection.
If we delve deeper into the satisfaction element, the sense of pride in crafting a unique piece that provides utility cannot be understated. Imagine showing guests around and pausing at your creation, a tangible testament to your skill and patience. However, not everyone has the luxury of time or the inclination to invest in such labor-intensive projects. When efficiency, time constraint, and guaranteed results take precedence, off-the-shelf wardrobes undeniably come out on top. A handy table comparing costs and effort involved might help here:
| Aspect | DIY Wardrobe | Store-Bought Wardrobe |
|---|---|---|
| Material Costs | Varied, depending on choice (can be high) | Fixed, often included in price |
| Assembly Time | Extensive, depending on skills | Moderate, often concise instructions given |
| End Result | Highly customized | Standard, tailored to market trends |
In making an informed choice between building your own versus purchasing, it boils down to evaluating what you value more highly: personalization and craftsmanship, or convenience and certainty. This decision is not merely about saving money; it's about aligning your lifestyle needs and preferences with your aspirations for that perfect wardrobe fit.
Tips for Building Your Wardrobe
Building your own wardrobe can be a satisfying project, merging creativity with functionality. To ensure success, it's crucial to start with a clear plan. Determine the purpose of your wardrobe—whether it’s to house a sprawling collection of clothes or merely to keep a neat, minimalist selection. Understanding your needs sets the foundation for every design choice that follows. This focus will guide your decisions on size, style, and internal configuration, ensuring your final piece is genuinely tailored to your lifestyle.
Planning the design is another critical step. Measure your space carefully! It’s surprising how often this detail is overlooked, leading to disastrous fits later. Factor in door swing space if you’re adding traditional doors or consider sliding doors to save room. Important too is choosing the right materials, with options ranging from solid wood for sturdiness and charm, to more budget-friendly particle board offering ease of assembly.
Next on the list is gathering the right tools and materials. Having a basic toolkit with a drill, saw, and measuring tape is essential before you begin cutting and assembling. Yet, quality tools can accomplish more than just the basic cuts; they can provide the precise edges needed for a polished look. Speaking of materials, consider the environmental impact. Some materials, although cheaper, aren’t sustainable. Reclaimed wood offers an eco-friendly option that often adds character to the piece. As an interesting fact, according to a study by the Home Improvement Research Institute, DIY projects involving reclaimed wood have risen by 12% in recent years.
Let’s talk about adding your personal touch. A bespoke DIY wardrobe isn’t just functional—it’s a chance to express personal style. Think beyond traditional paint and explore finishes like stains or even decoupage for something uniquely you. Include smart storage solutions such as adjustable shelving or pull-out drawers to cater to changing needs. A quote from the famous designer William Morris might resonate here:
"Have nothing in your house that you do not know to be useful, or believe to be beautiful."This mantra can serve as guidance throughout your crafting journey, reminding you to blend utility with design finesse.
As you proceed, enlist support when needed. Sometimes, tasks like installations or achieving level shelves can be cumbersome. A second pair of hands or routine consultations with a technician can ensure safety and precision. Don’t hesitate to lean into online communities where other DIY enthusiasts share their experiences and suggestions. These platforms are treasure troves for advice on avoiding common pitfalls while providing creative solutions to unique challenges. Embrace this aspect of community even within your DIY journey; there's a wealth of experience to tap into.
Finally, managing your budget accurately remains pivotal. Allocating funds smartly across quality materials, necessary tools, and unforeseen hiccups (because they do happen) will prevent stress down the road. Here’s an idea: maintain a simple spreadsheet to track expenses against your initial financial plan. This transparency keeps surprises at bay and helps refine cost estimates for any future projects, assuring each DIY wardrobe endeavor is both enjoyable and cost-effective.
When to Consider Professional Help
Embarking on a journey to build your own wardrobe may start with excitement and a vision of a bespoke piece that fits just right in your space. Yet, there are moments when calling in the professionals becomes more of a necessity than a luxury. So, how do you know when it’s time to dial an expert? For starters, if you're unsure about the design phase itself, including the accurate measurement, professional assistance can prove invaluable. The prospect of cutting materials to size without meticulous precision can present a significant challenge for those inexperienced in carpentry. In a situation where the wardrobe must fit into an awkward recess or requires unconventional dimensions, the deft touch of a joiner or a custom furniture maker could ensure a flawless result.
Moreover, if the idea of interpreting and implementing your designs into something tangible feels overwhelming, you aren't alone. Many DIY enthusiasts struggle with this transition and could benefit from an architect's or designer's skilled eye. Professionals can offer insights and tips, helping transform your dream wardrobe into reality without compromising functionality or aesthetics. Not to mention, they are adept in sourcing high-quality materials, sometimes at prices lower than what you might find as a consumer. This insider access to the trade can result in a finished piece that not only meets your expectations but may exceed them.
“A designer knows they have achieved perfection not when there is nothing left to add, but when there is nothing left to take away.” — Antoine de Saint-Exupéry
Another aspect to consider is the time investment involved. Building a wardrobe from scratch requires careful planning, patience, and dedication. For some, this aligns with their hobbies and passions, combining therapeutic crafting with functional results. However, for others juggling busy schedules, the time commitment can become an insurmountable obstacle. If you're finding it difficult to carve out continuous periods to work on your project, outsourcing the labor to a team with the necessary bandwidth might be the best option.
Lastly, health and safety considerations should never be understated. Handling heavy materials and working with power tools can pose risks, particularly if you lack proper training or experience. If you're unfamiliar with these tools or if the complexities of your wardrobe constrain you, hiring a professional can safeguard against potential accidents. A reputable craftsman is not only skilled but also insured, offering peace of mind that the job will be executed safely as well as efficiently, leaving you to admire the finished product without worry or injury.